Setting up your shipping processes in Shopify might appear overwhelming initially, but rest assured, it’s a manageable task once you understand the steps involved. The effort you put into this process is well worth it, as the ability to efficiently deliver your products to customers can significantly impact your business. So, let’s get started!
Step 1: Set up your Shipping Zones
In Shopify, shipping zones allow you to define specific geographic regions where you’ll be shipping your products. These zones are essential because they determine the shipping rates, methods, and rules that apply to customers in different areas. Here’s how to create shipping zones in Shopify:
- Log in to your Shopify account: To begin, access your Shopify admin panel by logging in with your credentials.
- Access the Shipping Settings: Once logged in, you’ll find your Shopify dashboard. On the left-hand side of the dashboard, navigate to the “Settings” option. Click on it to access various configuration settings.
- Go to Shipping and Delivery: After clicking on “Settings,” a submenu will appear. Choose “Shipping and delivery” from the options. This section is where you can manage all aspects related to shipping on your Shopify store.
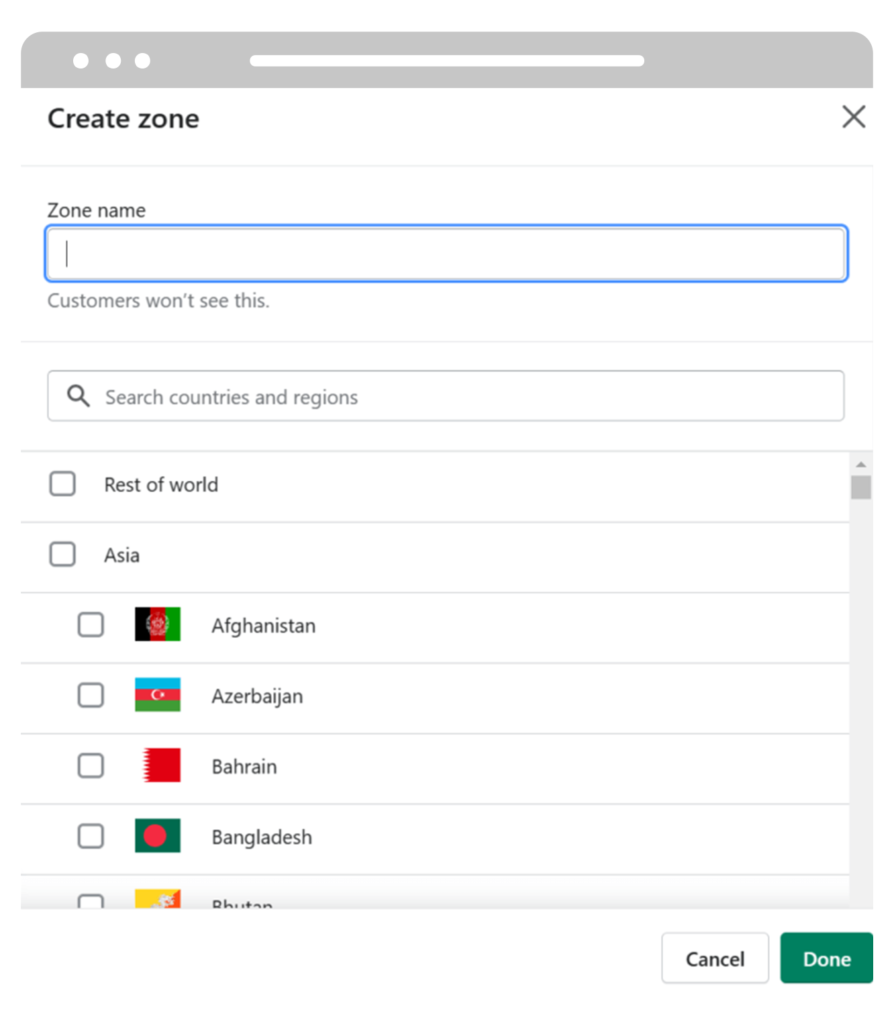
- Add a Shipping Zone: In the “Shipping and delivery” section, you’ll find a button labeled “Add shipping zone.” Click on this button to start creating a new shipping zone.
- Name Your Shipping Zone: After clicking “Add shipping zone,” you’ll be prompted to name the shipping zone. Give it a name that helps you easily identify the geographic region it represents. For example, if you want to create a zone for the United States, you can name it “US Zone.”
- Select Countries or Regions: Now, you’ll need to specify the countries or regions that you want to include within this shipping zone. You can choose one or multiple countries, and this will define the areas where the zone’s shipping rules and rates will apply. If you’re creating a US zone, select the United States. You can also include states or provinces if needed.
- Add Additional Rates and Rules: Once you’ve selected the countries or regions for the shipping zone, you can configure shipping rates, shipping methods, and any additional rules that apply specifically to this zone. This can include setting different shipping options or rates for different areas within the zone.

- Save Your Changes: Finally, make sure to save your settings after you’ve configured the shipping zone. This will ensure that the new zone is created and its rules are applied to the selected regions.
Step 2: Create Shipping Rates
After you’ve established your shipping zones, the next critical step is to define the shipping rates for each zone. Shipping rates determine how much your customers will be charged for shipping based on factors like the destination and weight of the items in their order. Here’s how to create shipping rates in Shopify:
- Access the Shipping Zone: Start by going to the “Shipping and delivery” page in your Shopify admin panel. You can reach this section by following the instructions from the previous step, which is usually found under “Settings.”
- Select the Appropriate Shipping Zone: On the “Shipping and delivery” page, you’ll see a list of the shipping zones you’ve created. Choose the shipping zone you want to create rates for. For example, if you’ve created a “US Zone,” select that.
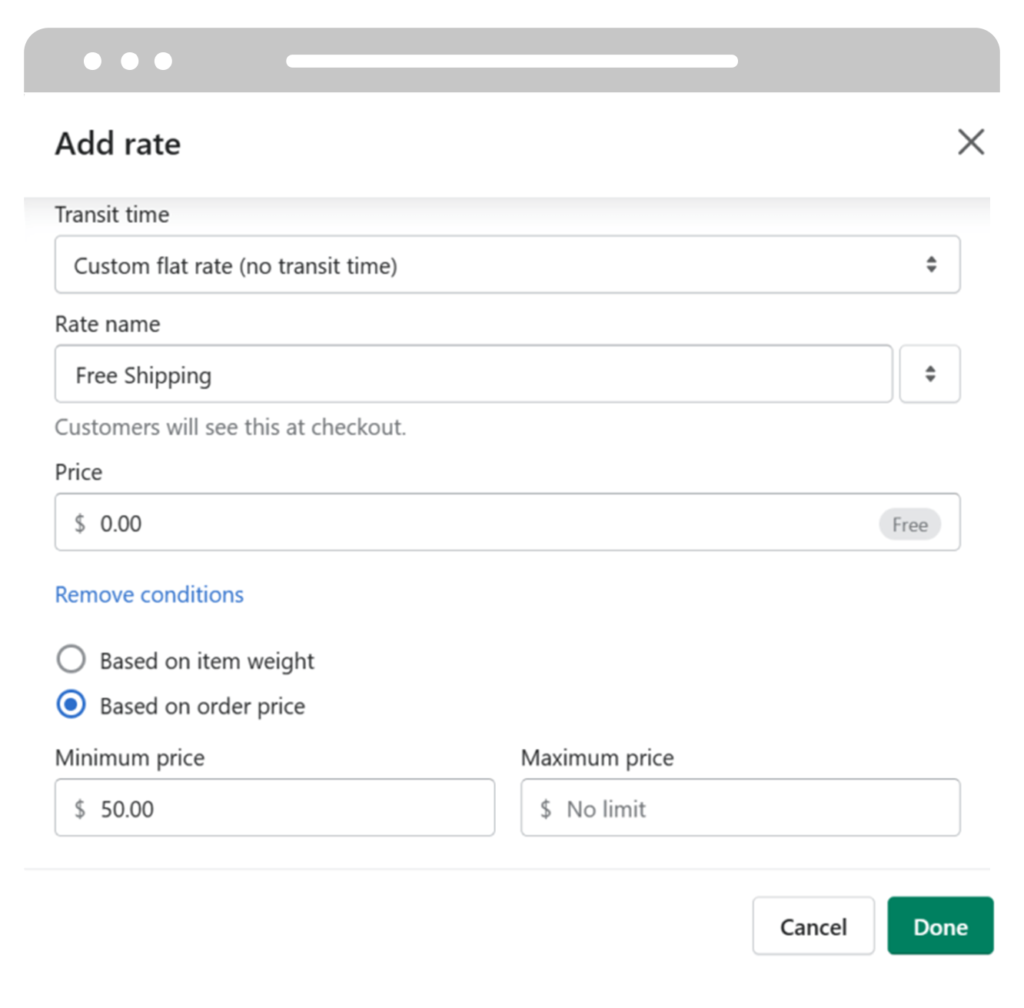
- Add a Shipping Rate: Once you’ve selected the shipping zone, look for an option that says “Add rate.” Click on this button to begin creating a shipping rate for the selected zone.
- Name Your Shipping Rate: When creating a new shipping rate, you’ll be prompted to give it a name. The name should be descriptive enough for you to understand what this rate represents. For instance, if you’re offering a flat rate for the United States, you could name it “US Flat Rate.”
- Select a Shipping Method: Choose the shipping method that best suits your business and the needs of your customers. Shopify offers several methods, including:
Flat Rate: A fixed shipping cost that applies to all orders within the selected zone.
Weight-Based Rate: The shipping cost is calculated based on the total weight of the items in the order.
Price-Based Rate: The shipping cost depends on the total value of the items in the order.
Carrier Calculated Shipping: Shipping rates calculated in real-time based on your preferred carriers (e.g., USPS, FedEx, or UPS).
- Set the Rate Amount: Depending on the selected shipping method, you’ll need to specify the rate amount. For a flat rate, this might be a fixed amount (e.g., $5), while for weight-based or price-based rates, you’ll need to define the rate calculation, such as “X dollars per pound” or “X percent of the order total.”

- Additional Configuration: Depending on the method you choose, you might need to provide more details, such as weight ranges, price thresholds, or carrier-specific information.
- Save the Shipping Rate: After setting up the rate, make sure to save your changes. This will add the new rate to the selected shipping zone.
Step 3: Set up Shipping Labels and Packaging
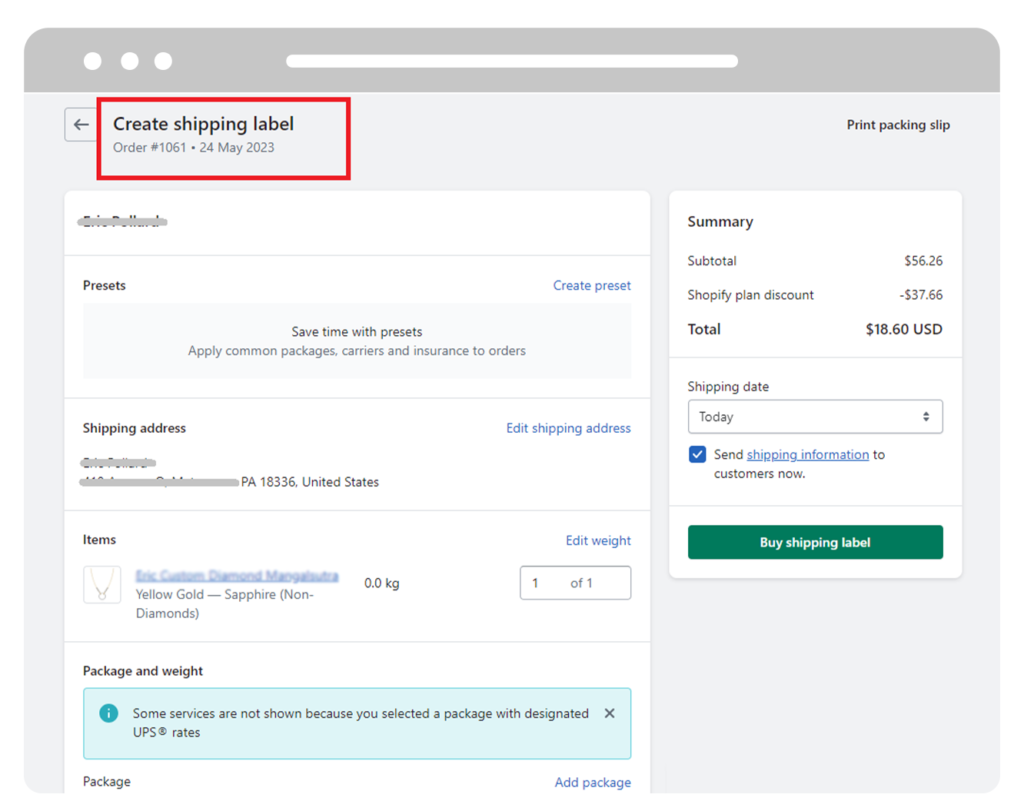
After configuring your shipping zones and rates, it’s time to address the logistics of labeling and packaging your shipments effectively. Shipping labels are crucial as they contain essential information such as the recipient’s address, your return address, and the chosen shipping method. Here’s how you can set up shipping labels and packaging in Shopify:
- Access Shipping Label Settings: Begin by navigating to the “Shipping and delivery” page in your Shopify admin panel. You can find this section by following the previous steps under “Settings.”
- Manage Labels: Within the “Shipping and delivery” page, look for an option like “Manage labels” or something similar. Click on this option to access your shipping label settings.
- Create Label Template: On the “Manage labels” page, you’ll typically find a button that says “Create label template” or a similar option. Click on this to begin creating a label template.
- Enter Company Information: You’ll be prompted to enter your company’s name and address. This information will be used as the return address on your shipping labels. Ensure that this information is accurate and up-to-date, as it’s essential for customers to know where to return items or contact you if needed.
- Choose Label Format: Select the label format you want to use. Common label formats include standard letter-sized labels or integrated label forms, which combine the shipping label with packing slips or other documentation.
- Select Default Shipping Method: Choose the default shipping method you want to use. This is the method that will be pre-selected for shipping labels when you create shipping labels in your Shopify store. You can change the shipping method for specific orders during the order fulfillment process, but having a default method can save time.
- Customize Label Layout (Optional): Depending on the label format you’ve chosen, you might have the option to customize the label layout. You can adjust the placement of elements like the recipient’s address, your return address, and other information.

- Save Your Label Template: After you’ve set up the label template as per your preferences, make sure to save it. This template will be used for generating shipping labels for orders you fulfill through your Shopify store.
Step 4: Test Your Shipping Setup
Testing your shipping setup is a crucial step to ensure that your shipping rates, labels, and overall logistics work seamlessly before you start fulfilling real customer orders. Here’s how you can go about testing your shipping setup in Shopify:
- Add a Product to Your Store: To begin testing, you’ll need a product in your store to work with. If you haven’t added products to your Shopify store yet, you can do so through your admin panel by navigating to the “Products” section. Create a product listing with a name, description, price, and weight.
- Set Up a Test Order: Once you have a product in your store, you can set up a test order. To do this, go through the following steps:
Open Shopify Admin Panel
View Product Details
More Actions Menu (Drop-down)
Select “Create Order”
Order Details Configuration
Complete and Test Order Created
- Check Shipping Rates: As you create the test order, Shopify will automatically calculate and display the available shipping rates based on the customer’s address and the product’s weight. Ensure that the calculated shipping rates match your expectations and are accurate for the order.
- Check the Shipping Label: After creating the test order, you can generate a shipping label based on the selected shipping method. Check the shipping label to verify that it includes the correct recipient’s address, your return address, and the chosen shipping method. Ensure that the label format and content match your requirements.
- Final Review: Before proceeding with the test order, take a moment to review all the order details, including the products, shipping address, and shipping rates. This is an opportunity to ensure that everything is accurate and aligned with your expectations.
- Place the Test Order: If everything looks good, you can proceed to place the test order. This helps you simulate the customer’s experience when ordering from your store. Make sure to use a test payment method (like a Shopify test payment) to avoid any real transactions.
- Verify the Fulfillment Process: Once the test order is placed, go through the order fulfillment process. This includes generating the actual shipping label, packaging the order, and preparing it for shipping. This will help you identify any potential issues in your fulfillment workflow.
- Review Shipping Confirmation: After the order is fulfilled and shipped, check the shipping confirmation and tracking details to ensure that they are sent to the customer correctly. This step ensures that customers are kept informed about the status of their orders.
- Ensure Smooth Delivery: If you’re able, track the test order through the shipping carrier’s system to confirm that it’s delivered successfully to the test address.
Conclusion
Setting up your shipping procedures in Shopify, though it may seem intricate at first, is a straightforward endeavor that can be accomplished through a few simple steps. By establishing shipping zones, defining shipping rates, configuring label templates, and rigorously testing your setup, you’ll ensure that your customers receive their orders promptly and in impeccable condition. A well-structured shipping setup not only enhances customer satisfaction but also lays the foundation for a successful e-commerce venture.


