Sharing your post from WordPress to social media is an effective strategy to encourage new entries and elevate current content. In any case, scheduling and carrying out a social sharing procedure might be resource-intensive. Fortunately, multiple solutions are available to help you save time.
This guide helps you to reveal various methods and adapt authentic strategies for sharing WordPress posts on social media channels.
Benefits of Automating WordPress Posts to Share
Nowadays, everyone is creeping around social media, either to advertise products or to find products. Thus you just need to adapt the right strategy to avail numerous advantages at the right time.
Social media is a handy tool to educate your targeted audience and promote your products. No one knows about your e-commerce business without sharing your content on social media channels.
There are many benefits to the social media domain. Some are mentioned here:
★Bring more traffic to the site.
★Boost brand identity, recognition, and visibility.
★Engage the audience effectively and help in community building.
★Generate more sales by attracting more leads.
★Improve your website’s ranking in search engines.
Utilize Jetpack Publicize Feature
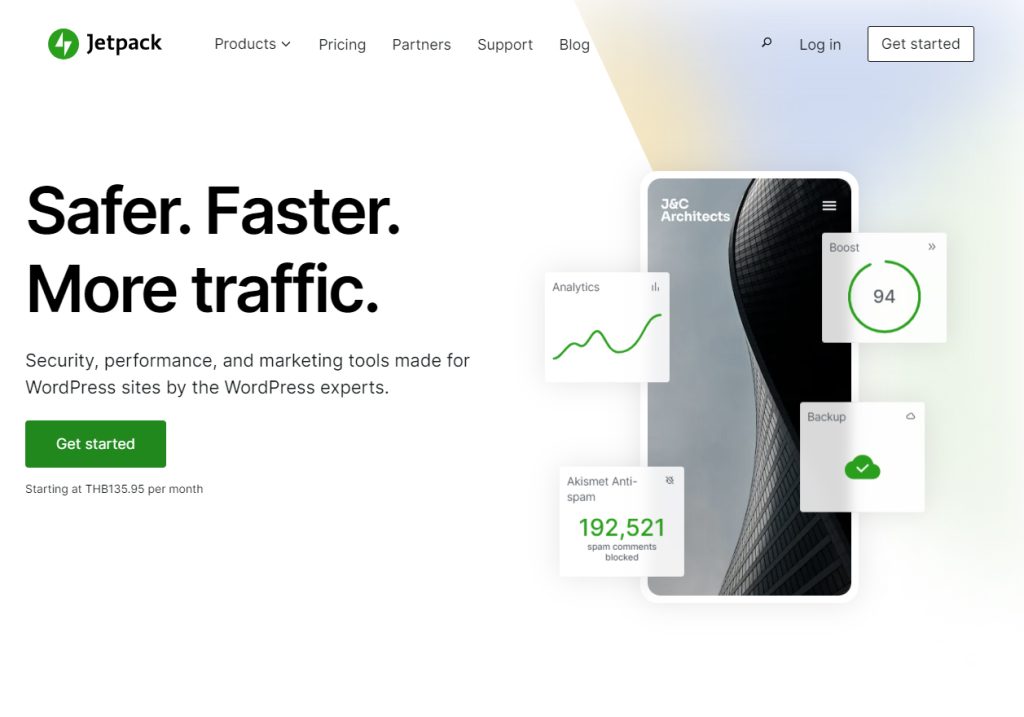
Jetpack is a WordPress toolkit that ensures your site’s security, speed, and growth. It works as a security plugin that secures your logins and shields your site from forceful attacks.
Visitors always prioritize the page having a fast loading time quality, Jetpack feature supports this quality with the lightning-fast content delivery network (CDN). It stores website content on geographically distributed servers, improving loading speed for visitors worldwide. Additionally, it automates social sharing, which allows you to improve site visitors.
Install and Activate Jetpack
First of all, you are required to make sure that you have already installed the Jetpack plugin.
*Note: You can install the Jetpack plugin straight from the WordPress plugin directory or by directly uploading the files to your FTP server.
Once the installation process is completed, you will be given the option to activate it by clicking Activate right from the plugin search menu or by following these steps:
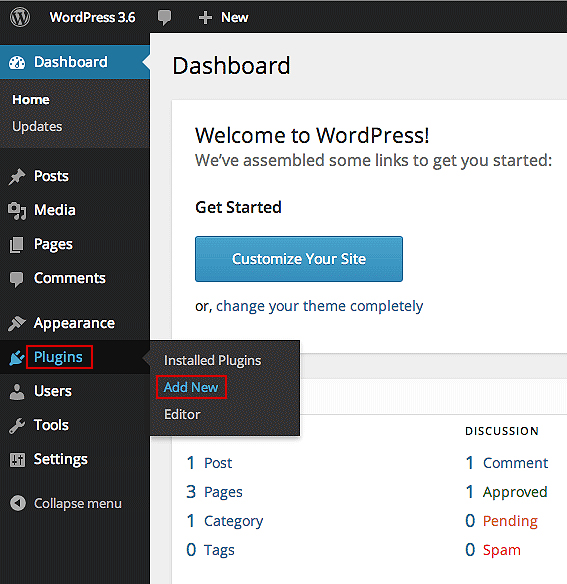
Step 1: Login into the WordPress Dashboard.
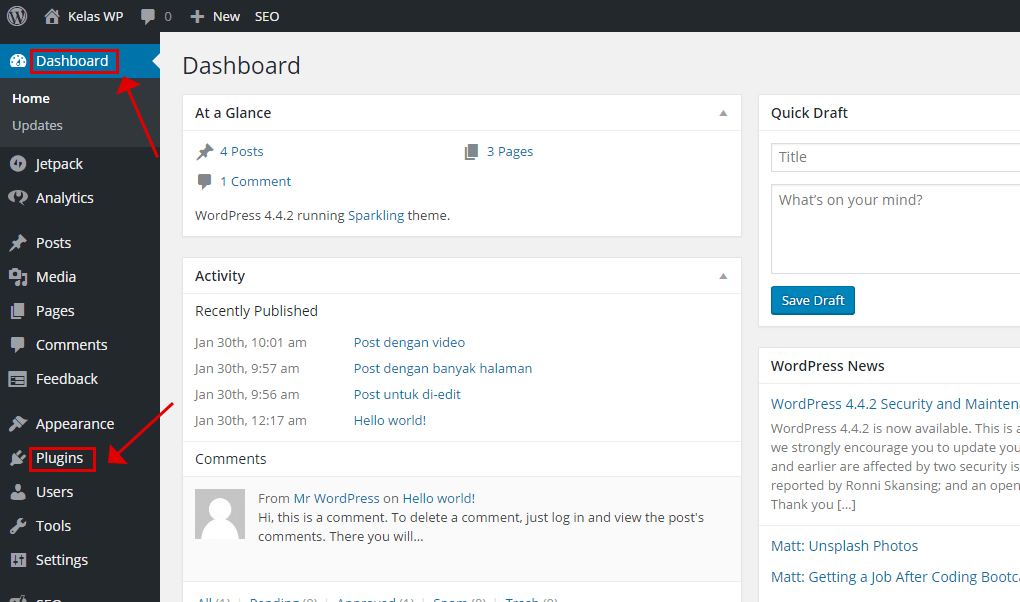
Step 2: Select a plugin from your menu. It is highlighted in the above image.
Step 3: Click Activate under the Jetpack tab.
Now you will be taken to an interface that will enable you to integrate your independently hosted WordPress site into your WordPress.com account.
Link Jetpack to WordPress.com
If you desire to enjoy the immense power of the Jetpack plugin, you need to link the Jetpack plugin to your active WordPress account. An existing account just requires a username and password but if you don’t already have an account you must go ahead and create it first.
Proceeding the above stage, Jetpack will involuntarily take to a screen setup that helps in linkage building.
Step 1: Click on the Setup Jetpack button.
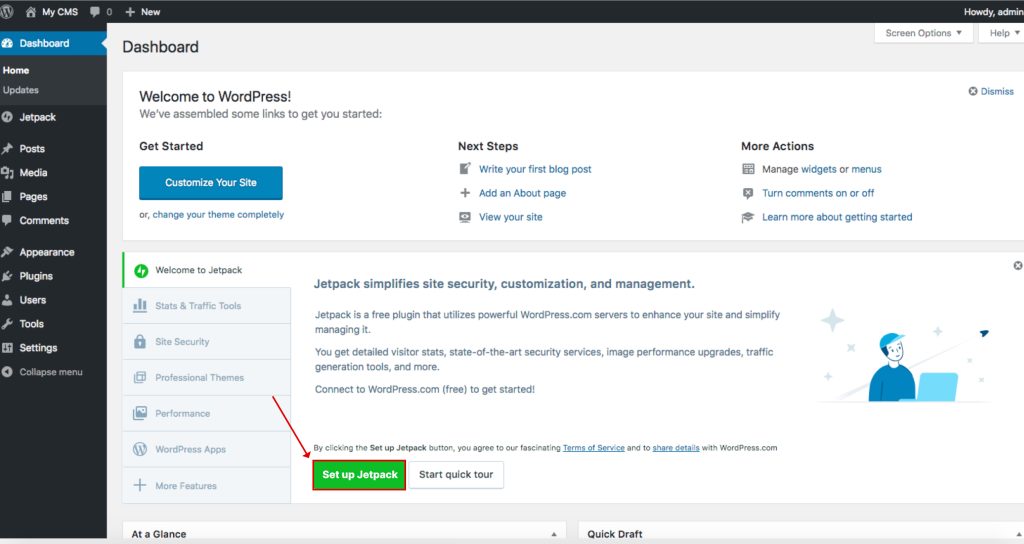
Step 2: Enter the username and password on the WordPress account.
Step 3: Activate all features.
Your standalone WordPress site is now linked to WordPress.com through the Jetpack plugin! Make sure to inform yourself of some of the critical Jetpack features:
‒Protect your website with Jetpack
‒Use it for WordPress backups
‒Optimize loading speed with Jetpack Image CDN
Employ Jetpack Publicize Feature
Publicize is an extremely advantageous feature of the Jetpack plugin, as it helps in advertising your posts and automatically shares WordPress posts to social media on selected channels like Twitter and Facebook when they are published.
Jetpack endorses the following social media platforms for automated posting:
★Google+
★Digg
★StumbleUpon
It is also useful if you are looking to define additional custom services for promotion purposes.
How Can You Activate the Publicize Feature?
Firstly, before you begin to link your social accounts with Jetpack, you need to activate the Jetpack publicize feature. Go through these steps:
Step 1: Open your administrator dashboard to access Jetpack, scroll down the page, and explore all Jetpack features.
Step 2: Find the “Publicize” feature and click on the provided link then click on the “Activate” option.
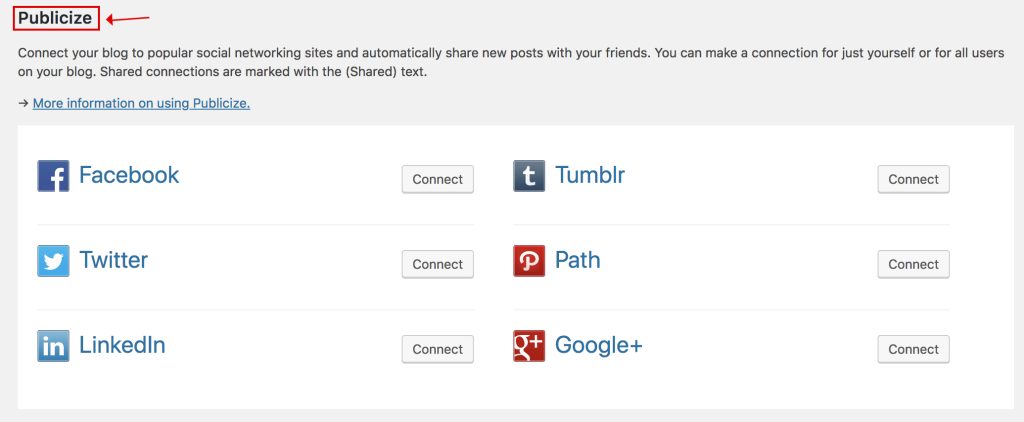
Step 3: Follow the same instructions, also activate the “Sharing Feature“, it will allow you to connect the social media sharing button.
Connecting to Social Networks
If you would like Jetpack to publish your posts on social media accounts on your behalf, it needs your authorization to access:
When you navigate to the settings, on your dashboard, you will find the linkage prospect where you need to connect Jetpack with social media channels just by simple verification like username and password. Once its connection is built up it will automatically access it to share on social media platforms.
*Note: It shares only posts; draft pages, static pages, or duplicate content will not be publicized.
Further, it also enables you to add a sharing button, which allows your readers to share your posts within their profile easily and quickly. Ultimately it leads to your publicity and promotions.
Schedule WordPress Posts with Buffer
Buffer is a web-based application that provides a smart way to integrate social media accounts and allows post sharing through the Buffer account. It also offers Buffer social media analytics like post-scheduling insights and URL shortening analytics, making them easier to share on social media with character limits. You can even add your team members, which facilitates dividing social tasks. Let’s understand how:
Set Up a Your Buffer Account
Primarily you need to visit the Buffer homepage and click on “Get Started Now” in the top right corner of the page.
As you click on it, it will provide a signup option where you need to enter your Gmail ID and generate a strong password to secure your account. Then follow up with the onboarding wizard. Clicking “Connect Channels” displays here:
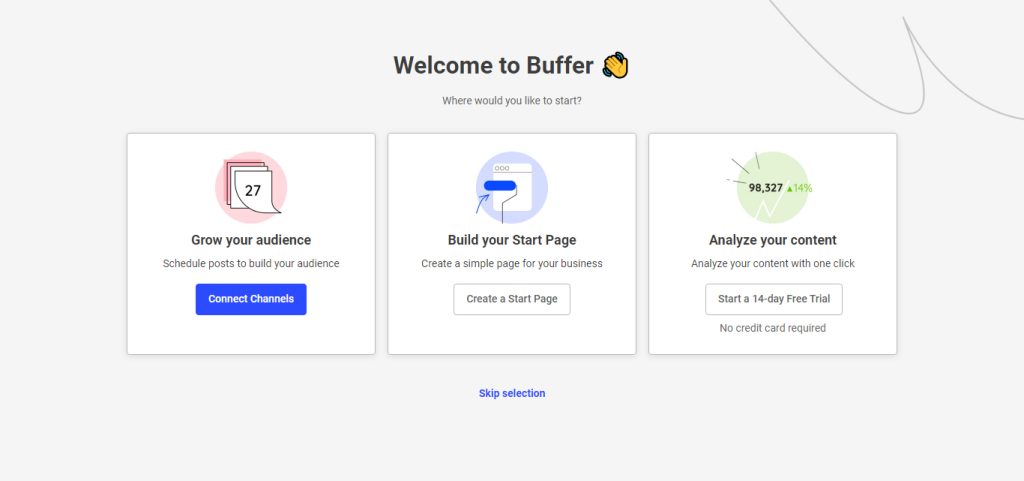
Once you are done, it opens various social media channels to connect with your Buffer account.
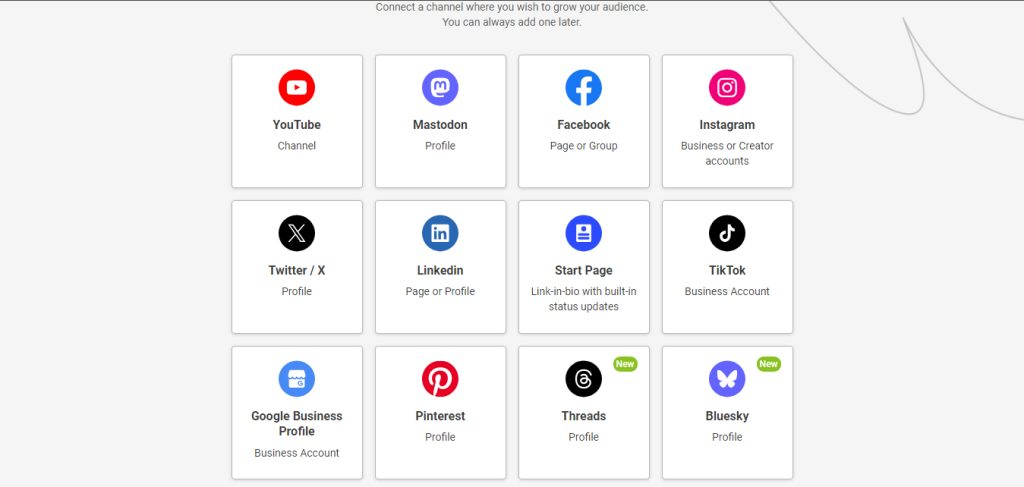
Now, select one like Facebook, which displays the “Start Connecting” option.
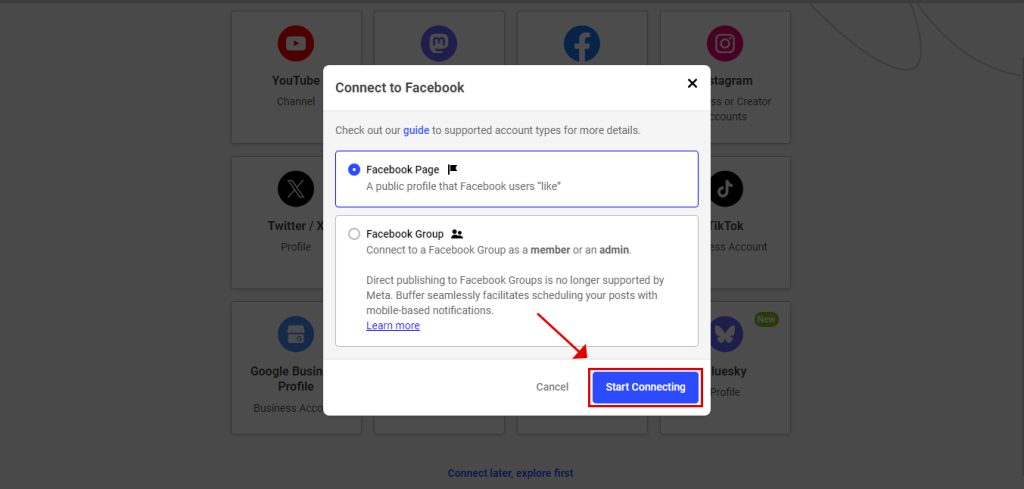
Next, you have to authorize the Buffer to access your Facebook account. Once done subsequently, you will reach the Buffer dashboard and then select the Facebook page.
Further, you can set “Posting Schedule” from the settings tab.
Finally, click the “Add Posting Time” option.
How to Connect Buffer to WordPress?
Now, an already created account at Buffer connects with your WordPress site.
To accomplish it, you are required to activate the WP to WordPress plugin on your website.
As you activate it, navigate into the settings in the menu and click the “Authorize Plugin” button.
Once you authorize it, it will lead you to another option to click “Allow Access”. It will interlink your Buffer account with WordPress.
Publish Your Blog Post
To automate post sharing, go to the WP Buffer > Settings plus the Posts tab.
Further, switch your social media channel tab that you have added earlier.
Then, tick the “Account Enabled” box.
Now whenever you publish your new post on your WordPress blog site, it will automatically schedule WordPress posts for social media publication.
Use Built-in Tools on Your Platform to Share Posts
Did you hear about the built-in feature that makes it easy to automate your post-publication from WordPress to social media channels? Yes, we are talking about the built-in features social media platforms offer to schedule and auto-post your content on their platforms.
Each platform has specific functionalities when it comes to sharing posts. Don’t worry; you will be guided at every step to get started. Here are some examples:
‒You can share the link to the post on your business page or personal profile on Facebook.
‒For X (formerly Twitter), you simply need to add your post URL to your tweet.
‒On Pinterest, just create a pin with your content link.
‒Google+ also allowed sharing post URLs ( Note: that Google+ is now discontinued).
Owners of X entrepreneur accounts and Facebook pages can schedule their posts, which is an added benefit.
*Note: Scheduling is possible if you have a standard profile; otherwise, the option is not available.
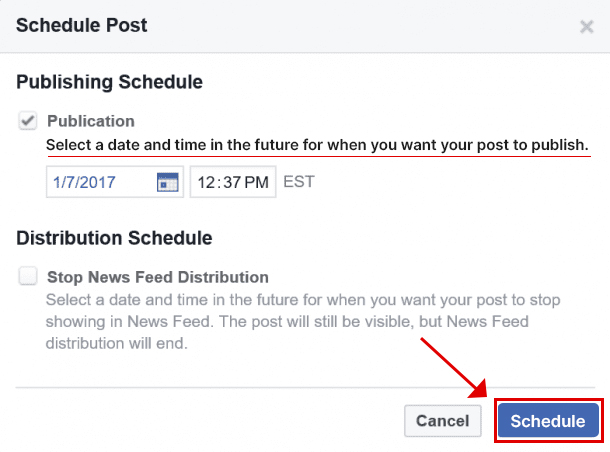
To schedule a post on your Facebook page, log in to the page, create a post, and include the link to the WordPress content you want to share. After creating your post, click the Publish button at the bottom right corner. Click on the small arrow beside the Publish button and select Schedule from the drop-down menu. Set the date and time for your post’s publication.
Let’s schedule and activate WordPress auto-post sharing on social media platforms with ease.
Add Monarch to Your WordPress Site for Social Sharing
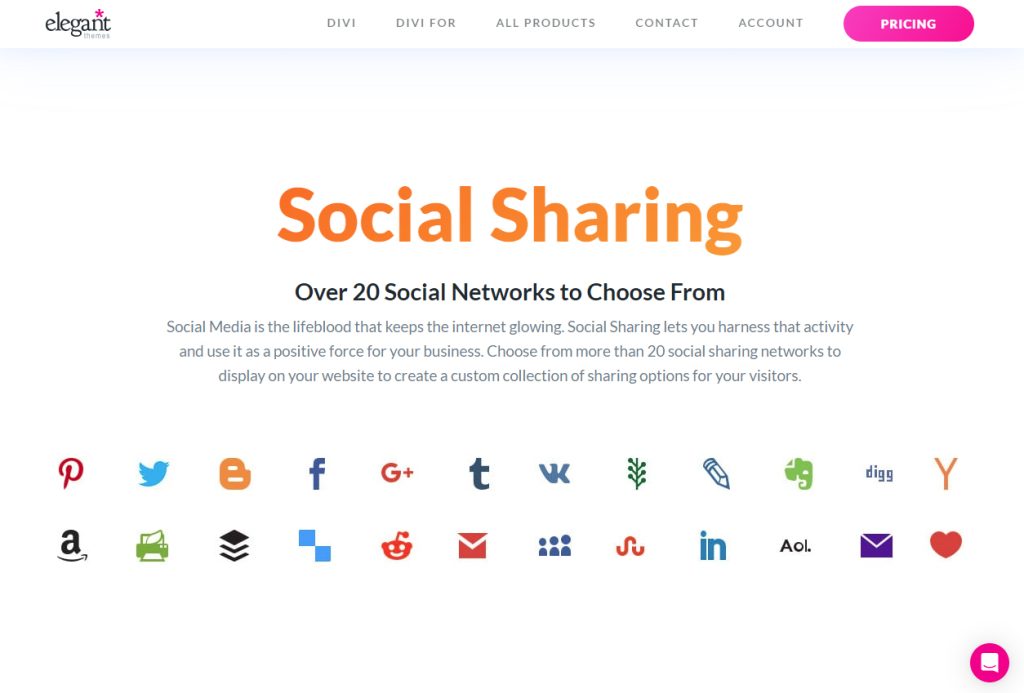
Monarch is one of the best social media sharing plugins for WordPress specifically created to boost your post sharing and audience engagement. This tool allows you to set up social media sharing buttons as well as follow buttons. Furthermore, it gives you the freedom to select from dozens of social networks and profiles. It supports a wide range of channels, which you can see here:
Activate Monarch for WordPress Auto-Post to Social Media
The monarch activation process is not very complicated. It is user-friendly. Primarily, you need to install the Monarch plugin from the Elegant Themes Area. After installation, open your WordPress dashboard and click on “Add New Plugin”. It directs you to the plugin page where you can upload it to your WordPress site through the WordPress dashboard.
Once it is uploaded, it will bring up a confirmation page where you can activate the Monarch Plugin. Just click the “Activate” button and proceed with the process.
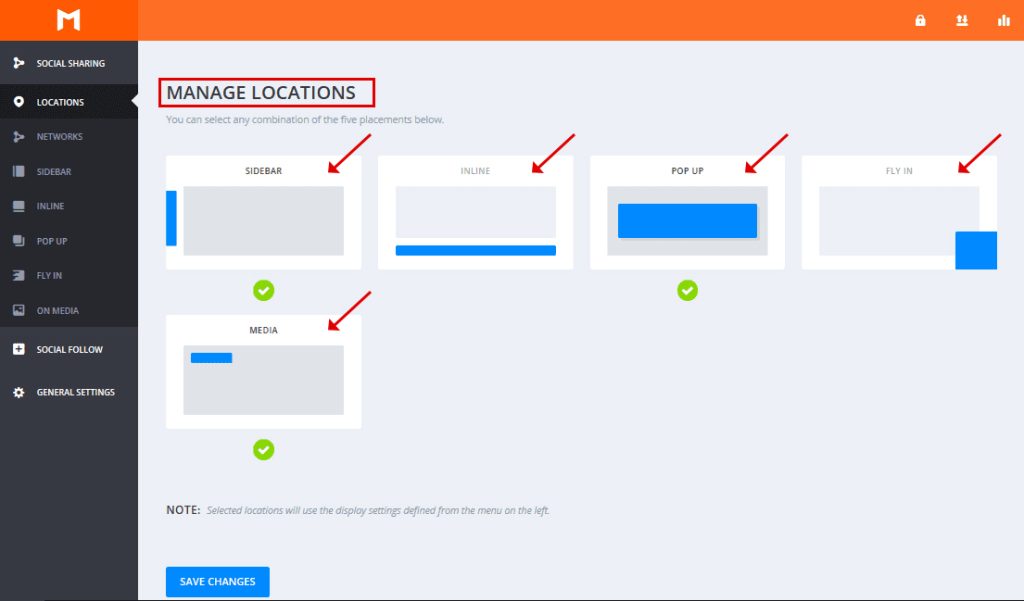
After completing the installation and activation process, click on the Monarch Tools setting on your WordPress dashboard. It will display the location tab. As you choose the preferred location, a green checkmark will appear. Don’t forget to save your changes.
Similarly, switch to the next tab, the Network tab, where you would like your audience to share your post from this option.
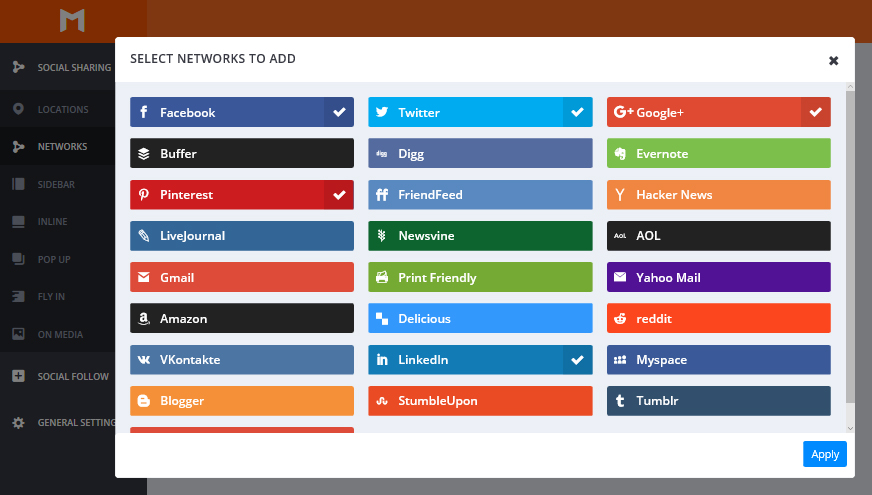
When you tap the gray “Add Networks” button, a pop-up window will open with a checklist of all available social networks. Thoroughly select the ones you want, and a checkmark will appear next to your selections.
The remaining tabs will help in personalizing each of your selected buttons. Additionally, you can also adjust and manage the shape, size, color, or count of the buttons. Furthermore, it will also give access to display buttons wherever you desire to show.
To explore further, you can delve into our comprehensive guide on the top trending social media plugins for WordPress in 2024.
Conclusion
Automating WordPress posts to share on social media platforms is extremely excellent for staying in touch with your targeted audience as well as former customers.
We have covered the most efficient ways that are very useful to employ for automating your WordPress posts to share on social media channels.
For more, stay connected.
